|
||||||||||||||||||||||||||||||||||||||||||||
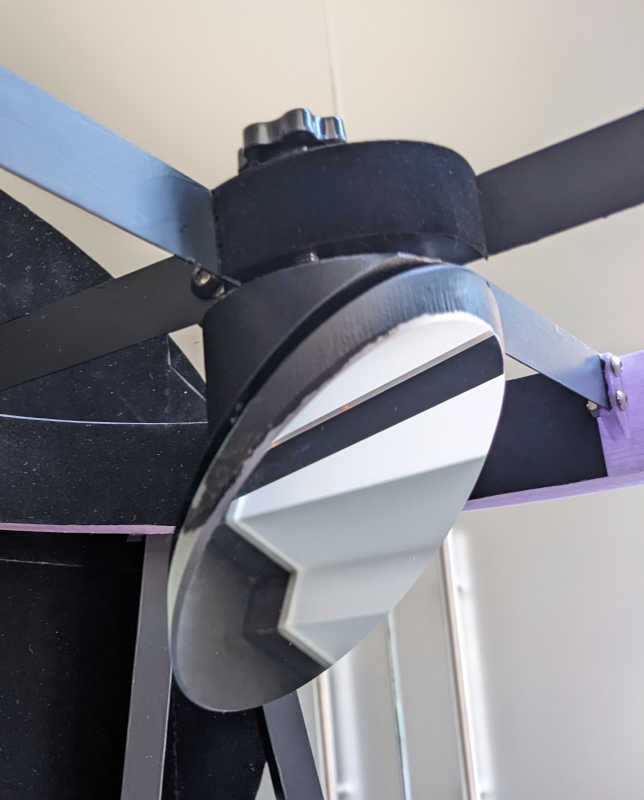
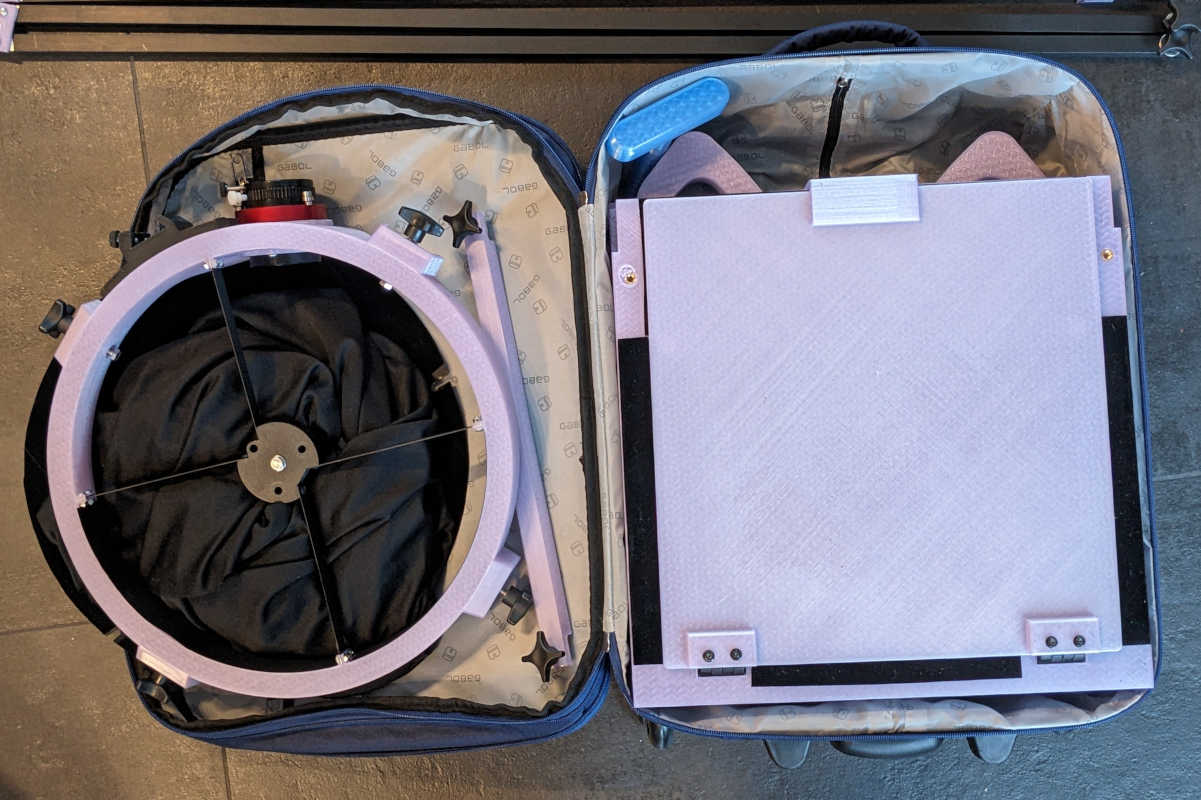
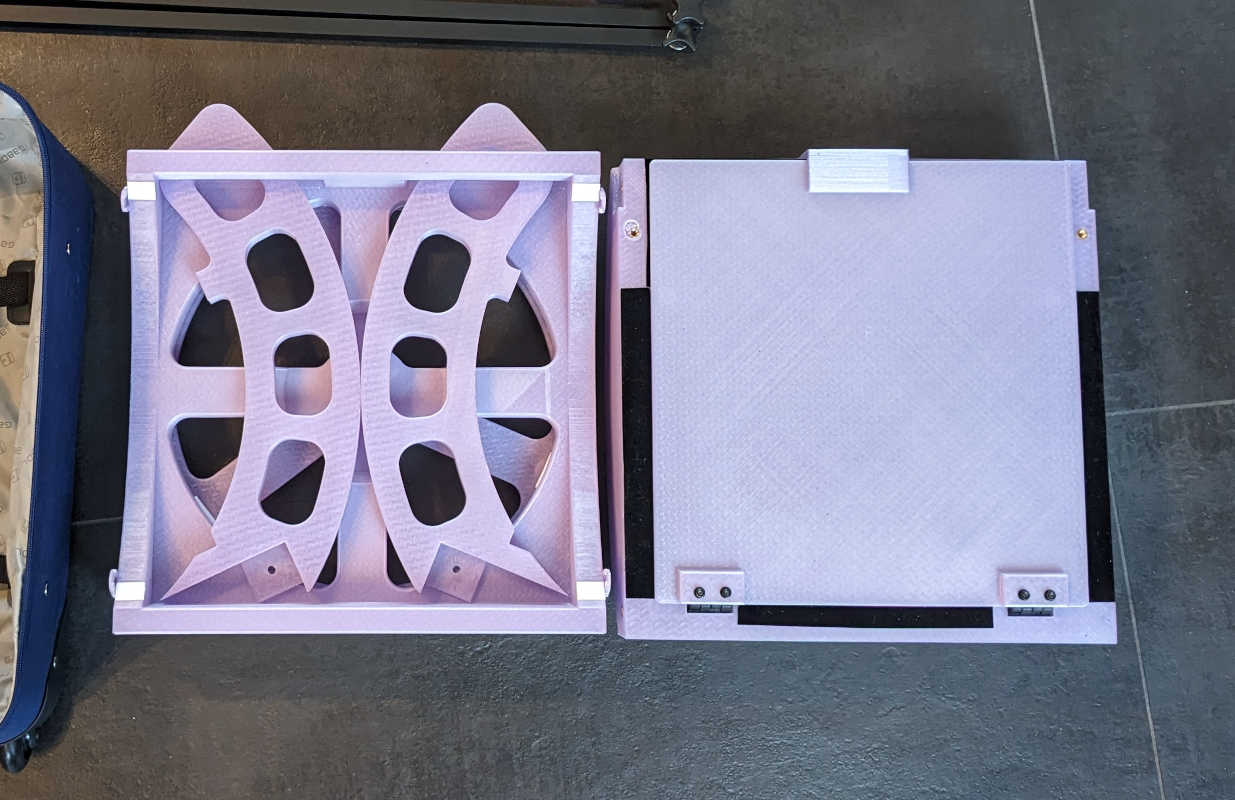
IntroductionSince summer 2024, I’ve been experimenting with 3D-printing telescope parts. My first project — mostly for learning purposes — was to print an iteration of my 16” mm F/5 telescope. I’ve documented it on the Dutch Astroforum. In recent months I’ve created a 300 mm (12”) F/4 grab-and-go and travel telescope — referred to as the T300 below. The goal isn't to 3D-print the entire telescope. Certain parts perform much better in metal, as a printed version wouldn't meet the desired quality. For example, the spider vanes need to be as thin as possible — preferably at most 1 mm thick. Steel remains the best option for this. Likewise, for the truss tubes it would not make any sense to replace aluminum or carbon tubes by low-stiffness printed filament. For the T300 telescope I use 15×1 mm square aluminum tubing as the best option. In short, 3D-printing mostly replaces the plywood components I would normally use in telescope construction. It’s also a good idea to keep the mirrors in glass. 😉 Besides the optics (300 mm F/4 primary and 75 mm secondary) the other main purchased component is the 2” focuser. I have not yet found a 3D-printed model for a 2" focuser that meets my demands. The commercial KineOptics HC-2 helical focuser is compact and lightweight. A F/4 Newtonian pairs perfectly with Houdini coma-correcting eyepieces. The eyepieces weigh less than 600 grams which makes it easy to keep the telescope in balance without counterweights. 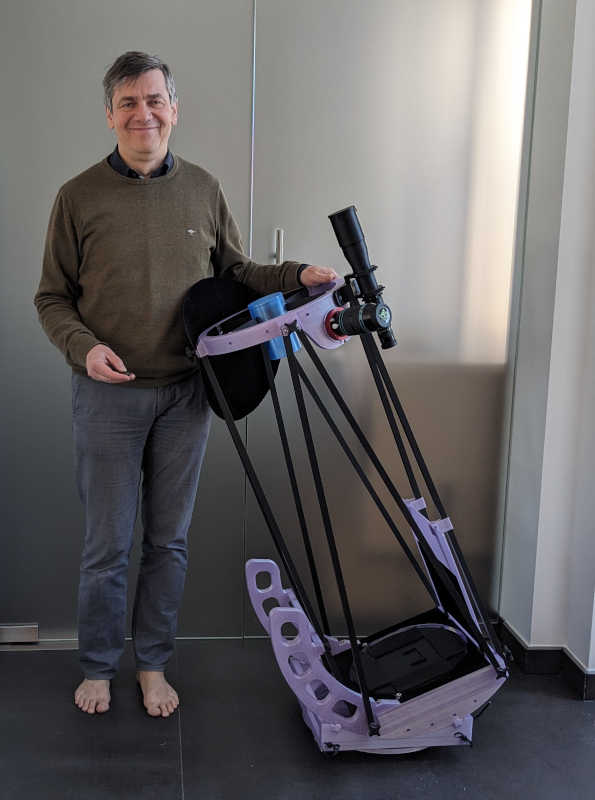 Goals for the T300Produce a high-quality, mostly 3D-printed 300 mm F/4 grab-and-go scope. High quality here means a solid structure that supports high magnifications and smooth tracking. Other quality targets are good shielding from stray light, easy collimation and adequate mirror cooling. Design the telescope to be travel-safe, fitting in a suitcase for car or plane trips, with optics adequately protected. The T300 should mostly fit in a 55×44×27cm suitcase. Make a scalable design that could be used for a 25” or larger telescope. 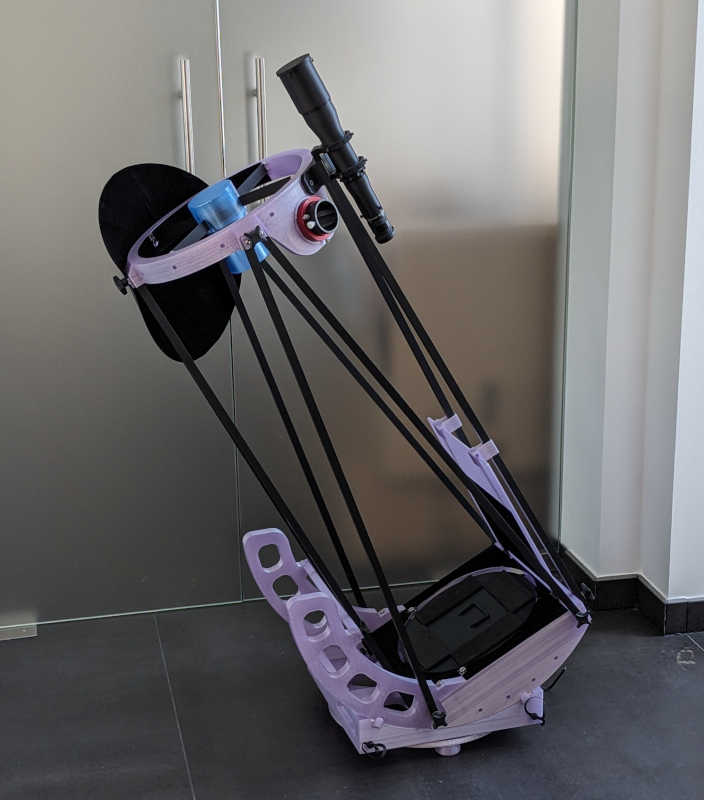
 WeightThe T300 structure uses about 4 kg filament. The truss tubes weigh 1.3 kg, the optics are about 5.5 kg (this depends mostly on the thickness of the primary — 37 mm), and the other hardware is around 1 kg. With finder and eyepiece, you arrive at a total weight of the telescope between 12 and 13 kg. No counterweights are required when using Houdini eyepieces and a home-made 8×50 finder. In this configuration the telescope is perfectly in balance. With a 40 cm (16”) square footprint and a total weight of only 12 kg, the telescope is easy to move. Just lift it by holding two truss tubes or the upper cage ring. This setup is ideal as a grab-and-go telescope: it can remain assembled and is easy to move outside when needed. CostsOptics: 300 mm F/4 mirror sets start around 900€. Focuser: could be 3D printed but I haven’t found a model I’m completely happy with. Currently using the KineOptics HC-2 at 150€. It’s lightweight and good quality, but I still would love to have the good old Moonlite focusers available. Filament: 5 kg, around 100€. Truss tubes: 10 m of 15×1 mm square aluminum tubing, around 40€. Other parts: 0.7 mm steel sheet 10€, some stainless hardware 15€, knurled knobs 20€, threaded inserts 10€, black paint 15€, flocking material 10€, 92mm cooling fan 10€, Teflon 5€. The table below summarizes the costs of the structure without optics. The structure has a material cost around 400€. Printing the focuser would lower the cost to around 250€.
Most of the construction effort, aside from ordering parts, comes from 3D-printing — you'll need to monitor the printer for about a week. True construction work is limited to the primary mirror cell (half a day) and the spider vanes (half a day). There is some finishing – cutting the truss tubes to the right length and connecting them in pairs, flocking the light shield and top of the mirror box, painting the spider vanes and truss tubes black, connecting the fan. Taking everything into consideration, it’s probably around two full days of construction work, and a week of supervising the 3D printing. Then you can drop in the optics, and with some good eyepieces you have the ultimate grab-and-go scope. 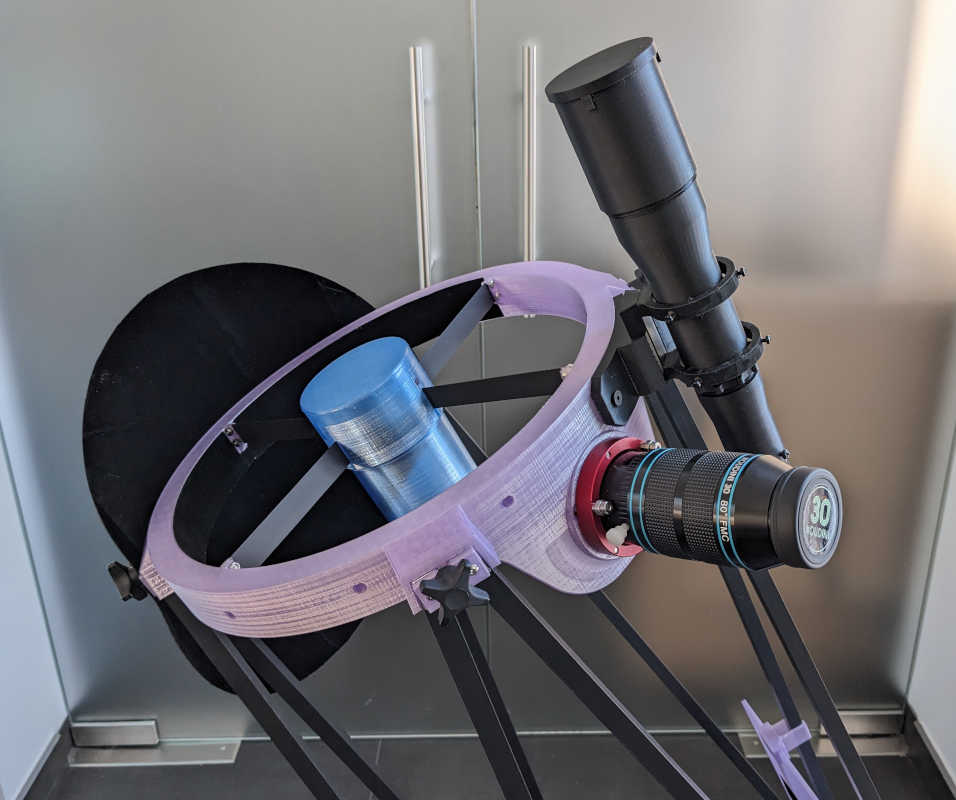
 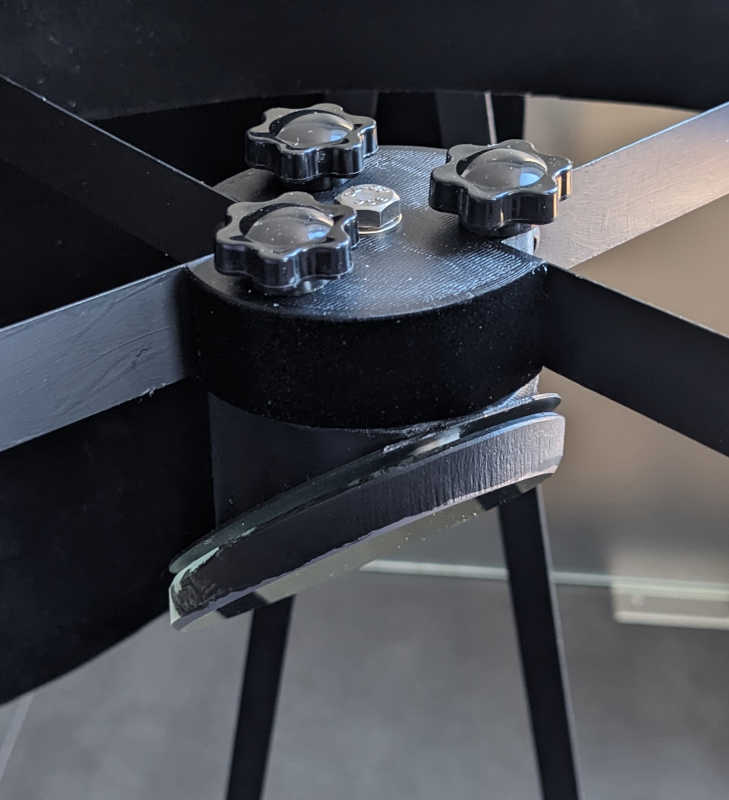
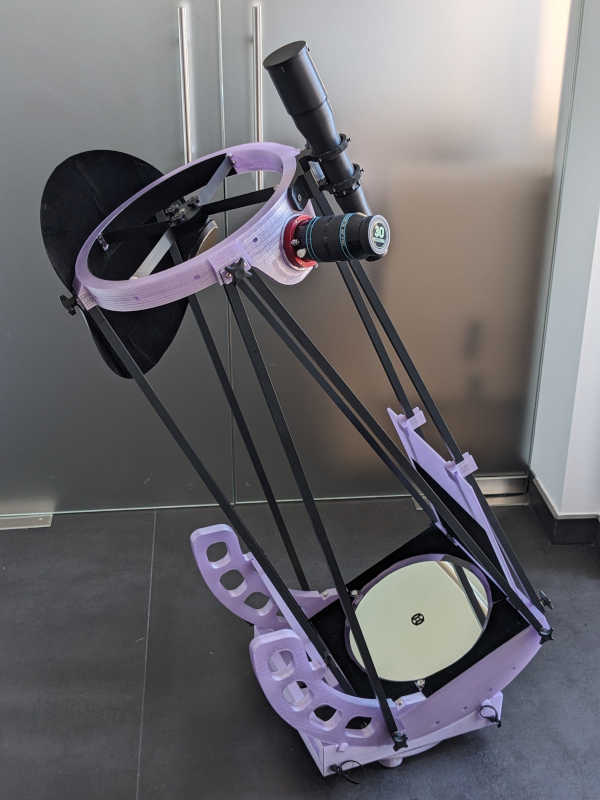
 Ventilation, collimation, etcThe 92 mm fan suspended below the primary mirror accelerates the cooling and arrival at thermal equilibrium. The fan is powered by a USB bank. Collimation is done from the front using two bolts that adjust the primary mirror's position. Several handy 3D-printed accessories enhance usability, including:
3D-printing offers many opportunities for telescope builders!  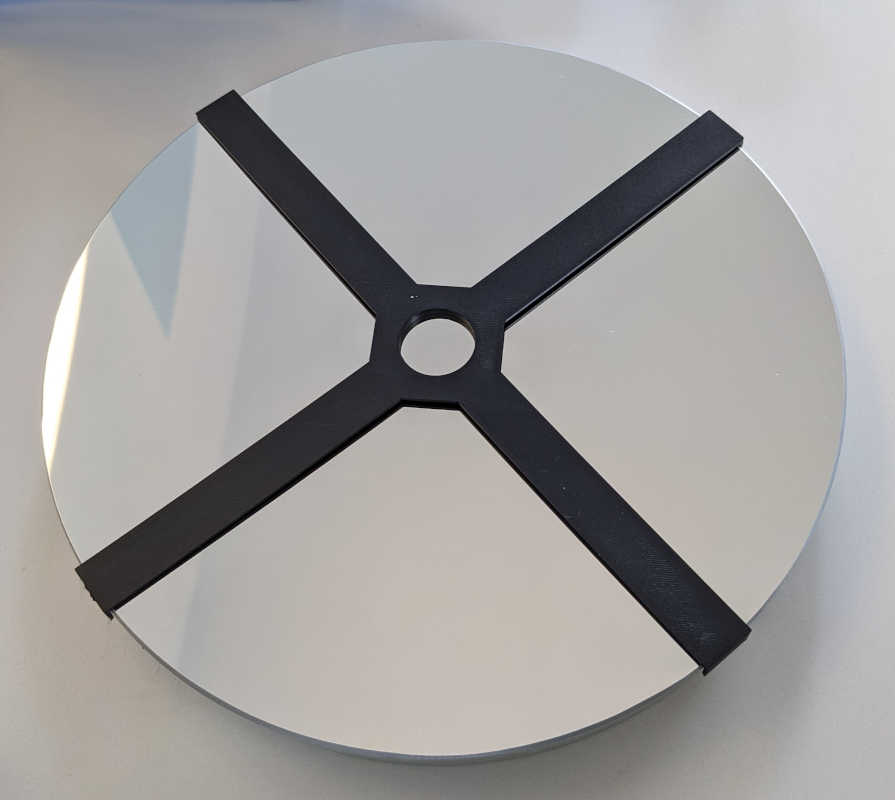 Light shield and shroudThe light shield in front of the focuser is a 380 mm diameter circle printed with 0.6 mm thickness (3 filament layers). It’s covered with flocking paper to add some real blackness behind the secondary mirror. The shroud is a black cloth – about 160×100 cm – with printed attachments that fit around the knobs of the truss tubes. The shroud not only blocks stray light but also keeps the observer’s body heat from affecting the OTA. 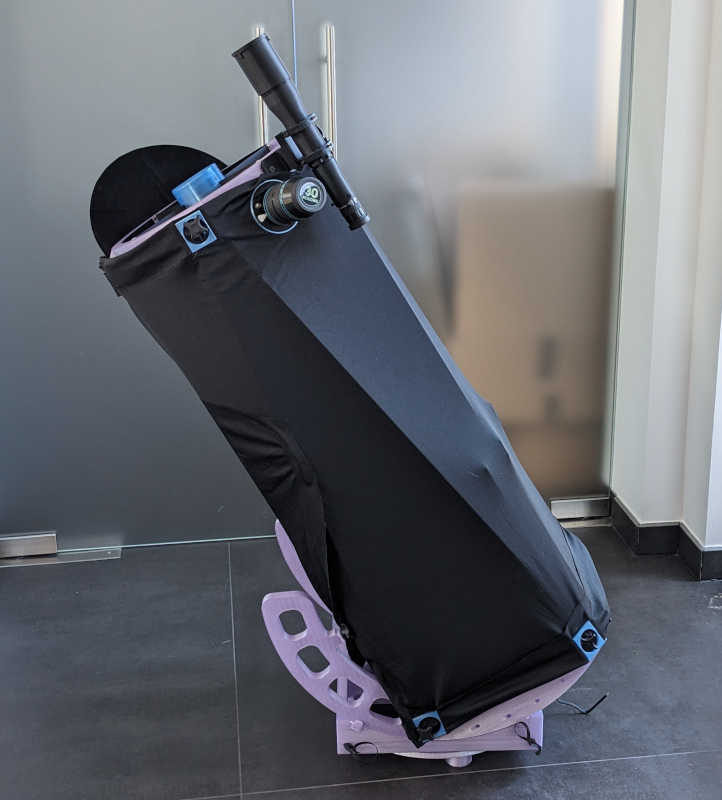 8×50 FinderFinders are very easy to print. I presented my 13×80 and 9×60 3D-printed finders on the Dutch Astroforum. The design has optimized interior baffles, and an oversized dew shield. I use the 13×80 finder on the 1100 mm telescope, and the 9×60 on the 16” telescope — they work really well. These finders are too large and too heavy for a T300 where it’s better to use a 50 mm model. A 52 mm F/4 lens and 25 mm Plössl eyepiece that cost around €30 together are the starting blocks for a good 8×50 finder. The weight including a standard dovetail foot is 280 grams. 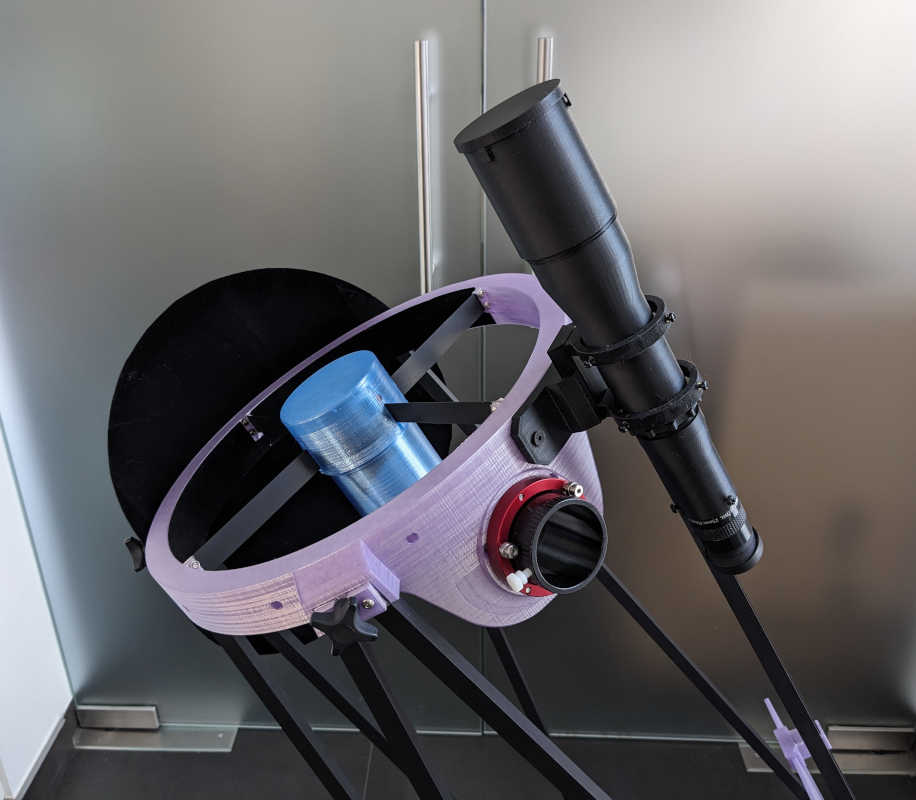 Equatorial PlatformI made a 3D-printed equatorial platform for the 16” last year, it also works for the T300. It weighs about 2.5 kg and costs around 100€. More details on the second page of the Astroforum thread already linked above. It would probably be a good idea to create a reduced version specifically for the T300 with its smaller size and lower center of gravity. Printed on a larger 400×400 bed the platform would just be two parts. 3D-PrintersMy first printer was a Bambu Lab P1P. I can strongly recommend this printer if you start with 3D-printing. It reliably produces high-quality prints with minimal setup. However, the bed size of 256×256×256 mm is quite limiting for telescope building. Last year’s 16” scope I managed by cutting the major parts in four. For example, the 480 mm square rocker box was assembled from four 240×240 mm parts. For the T300 project I wanted a larger printer so that all the parts could be printed in one go. I settled on the Creality Ender 5-Max, with a 400×400×400 mm bed. Perfect for the T300, since the largest part dimensions are 380 mm. The Ender 5-Max requires a bit more tinkering with filament settings, but in the end produces good results. Not quite as good as the P1P, but very much adequate for the project. If ever I would move forward with printing a 25” scope, I would consider acquiring a printer with 800×800 mm bed. Alternatively, all major parts could be cut in four and assembled after printing. FilamentsThe most affordable and easy to use filament is PLA – this produces very nice prints with smooth surfaces. The main drawback of the material is that it softens from 50°C. PLA parts should not be left on a car dashboard in direct sunlight. PETG is more resilient and resists up to 70°C. It is less stiff than PLA and does not print as neatly (more stringing). Overall, the better choice for outdoor use. There are carbon fiber reinforced versions of these materials with higher stiffness, but I’m not sure they’re worth it – even with normal PETG or PLA it’s possible to create a very good telescope structure. Thickness Rules!In general, 3D-printer filaments are not very good mechanically, compared to ordinary materials like steel, aluminum or wood. For the stiffness of the telescope the most important material property is the elasticity modulus E (expressed in GPa). The following table shows the (lack of) stiffness of filament compared to ordinary materials:
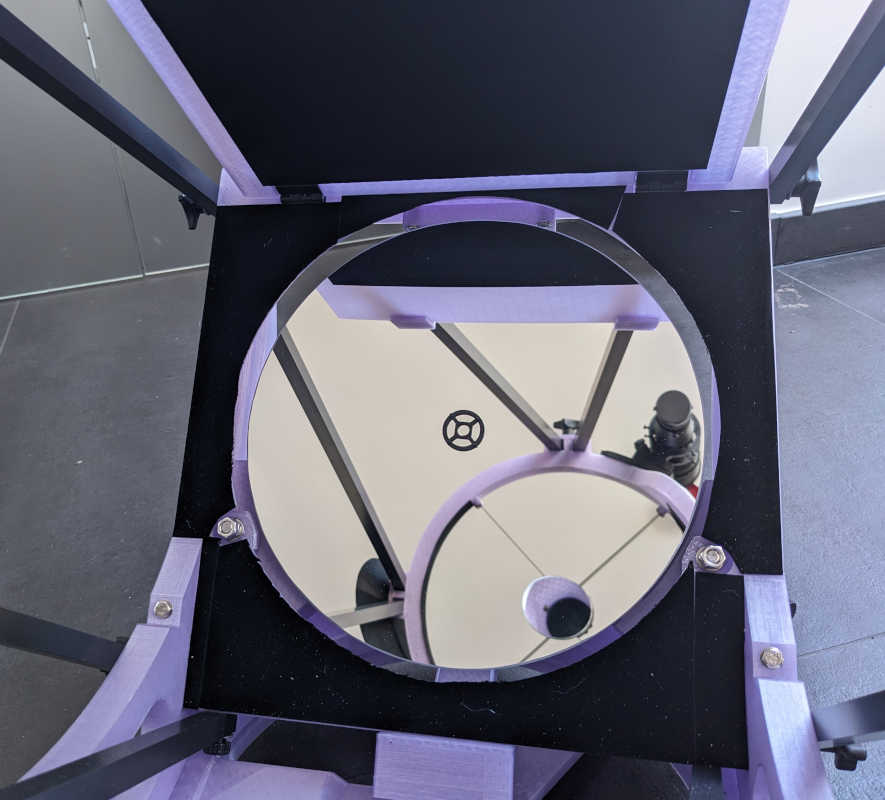
To compensate for the lower stiffness of filament, parts need to be made thicker. Luckily, the stiffness of a part is proportional to the cube of its thickness. To give a 3D-printed part (say, the side of the rocker box) the same stiffness as an equivalent wooden part, you would need to double its thickness. Lightweight!A nice aspect of 3D printing is that big volumes are not solidly filled. Instead, the 3D-slicer software will make the interior mostly empty — often with fill ratios between 10% and 15%. This technique is like making sandwich structures with plywood outer layers and a foam core — the result is very stiff and lightweight. 3D printing automatically produces this result. Even thick parts, say 20 or 30 mm thick, will remain very lightweight because the part will be printed with thin walls (say, 1 mm thick) and the remainder filled with only 10 to 15% material. A 30 mm part with 12% filling will actually have the same weight as a 5 mm solid part. This means that it’s easy to produce very stiff and lightweight parts as long as you respect the appropriate thickness for the lower elasticity modulus of the filament material. Every part of the T300 feels very sturdy and very light – you can easily lift the whole telescope structure with one hand – it’s only 6 kg. OpticsI purchased a 300 mm F/4 mirror set with a 75 mm secondary from Orion Optics UK. The set was delivered on schedule in September. I opened the box only in November (when the telescope structure was ready), and I found that the primary had a zone with scratches on the coating – as if that zone had been wiped with a cloth. Maybe from the transport, and maybe the scratches are just residues that will disappear at the first cleaning – we’ll see later. It’s not a great deal, but this was the first time that I got a new or newly coated mirror with a less than pristine surface. On the moon and Jupiter, the mirror looks good, but I haven’t had the seeing conditions yet to establish whether it’s just good or excellent. 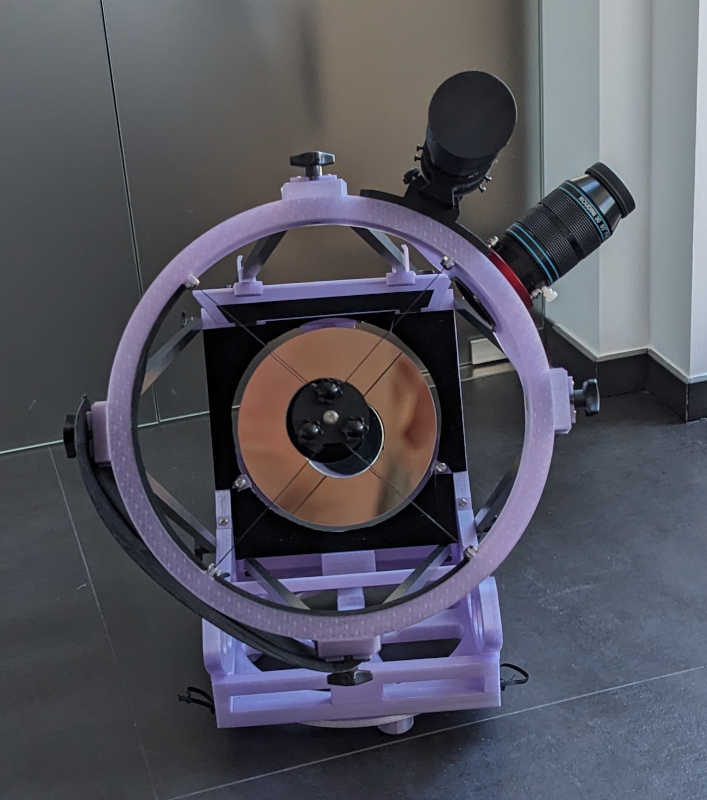
 3D-Model and SlicerThe design was made in FreeCAD, an excellent software for creating complex, parameterized 3D-models. This is how the software sees the telescope:  From the 3D-model the actual printing instructions are created by a so-called "slicer" software — I use OrcaSlicer. The various printed parts are shown in the following image. With the 380 mm size of the main parts the printer capacity of 400×400 is put to very good use: 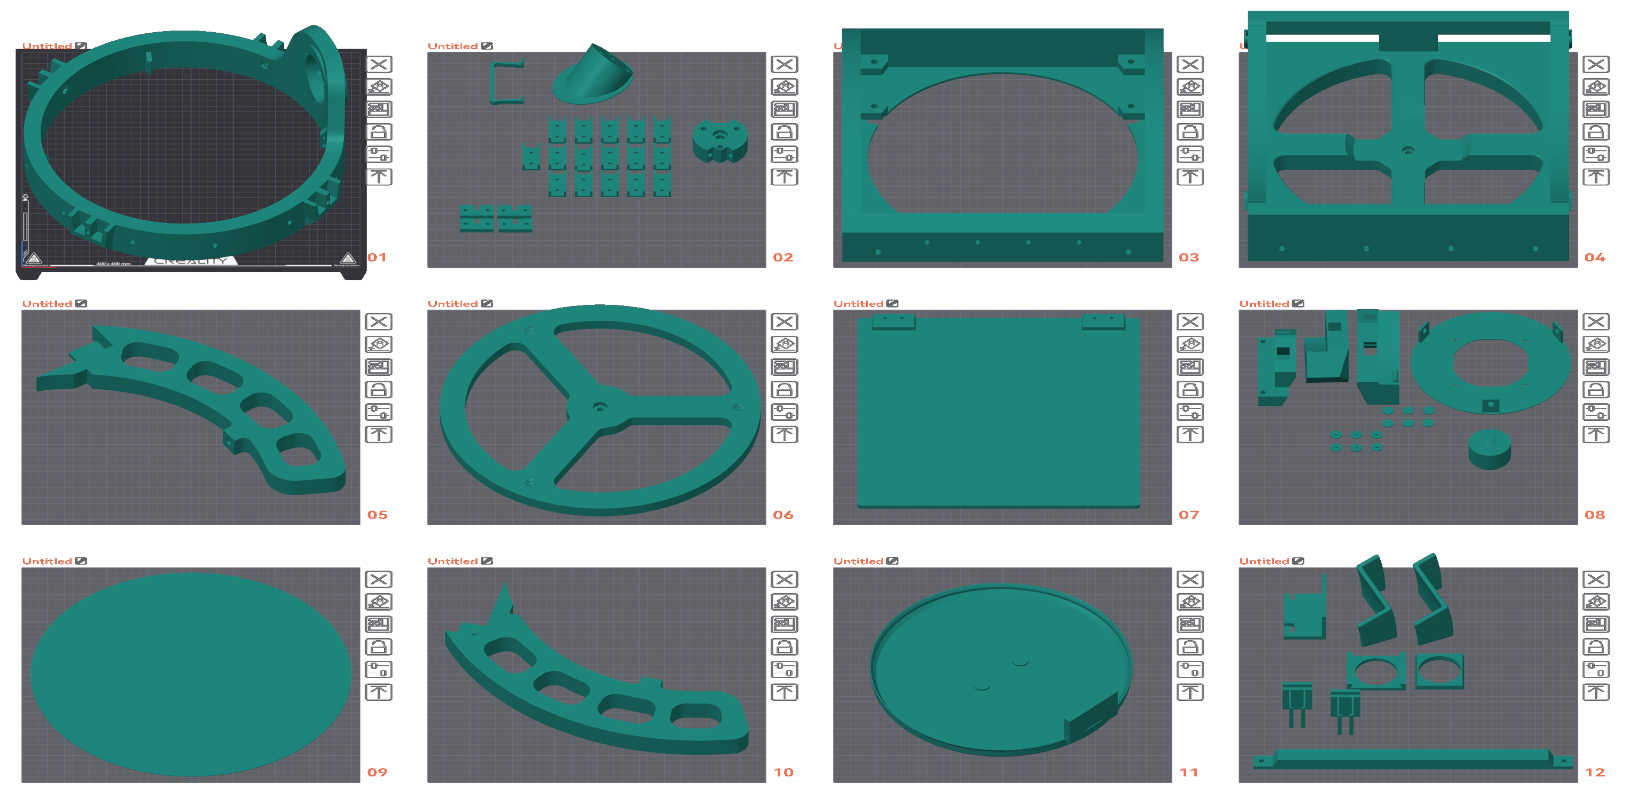 The telescope in useWith a focal length of 1200 mm, you can observe sitting. Quite the change from the big ladders of the 25" F/5 and 1100 mm F/3.6 telescopes! The eyepiece is inclined 35° from horizontal to provide better comfort at low altitudes. 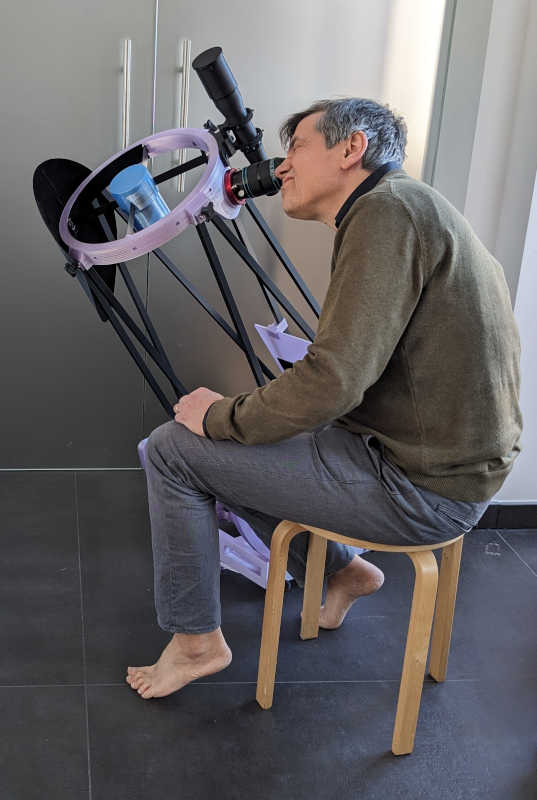 The current Houdini eyepieces provide the following powers and fields:
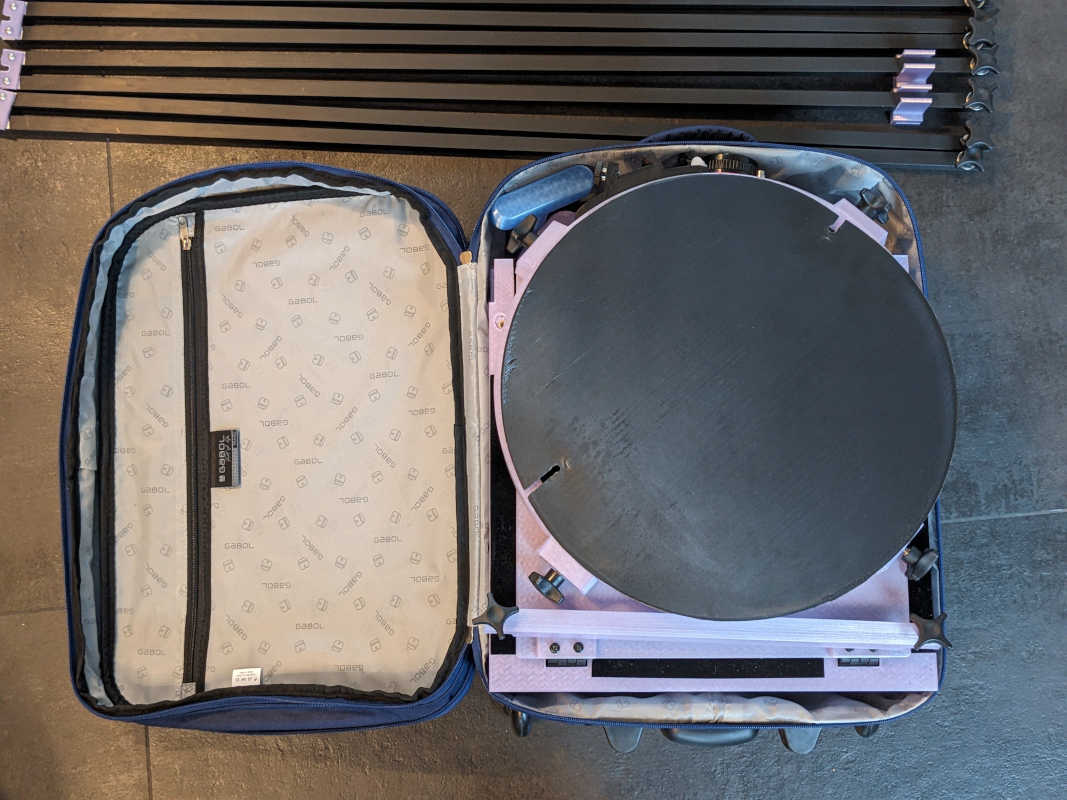
The Houdini 30 gives too large an exit pupil (7.5 mm) for my aging eyes, but the 2-degree field is just too awesome to miss. At high-power some additional focal lengths are required — the planned 5.3 and 4 mm eyepieces, together with the 2× Barlow are needed. The telescope is nicely balanced and the movements are fluid – even simply with Teflon on filament. Vibrations do not damp as quickly as I would have hoped. Being used to 80 kg 25” and 250 kg 1100 mm telescopes that are rock-solid because of their larger mass, I have to get used again to the slight shakiness of light-weight telescopes. Same for the KineOptics HC-2 focuser. It works rather well, even at F/4, but it will need some getting used to. Rotating the eyepiece to focus still feels weird to me. Over-all, the telescope feels sturdy and has a very convenient format. The 40 cm square base and low 12 kg weight means that the telescope can be handled and moved around quite easily. I guess that 300 mm diameter is about the biggest telescope that is still very easy to handle. Travel modeThe major parts of the T300 fit in a 55×44×27cm suitcase. The finder, secondary mirror in its protective case, eyepieces and truss tubes would need another bag — for plane travel the truss tubes could be cut in two. The setup is very straightforward. 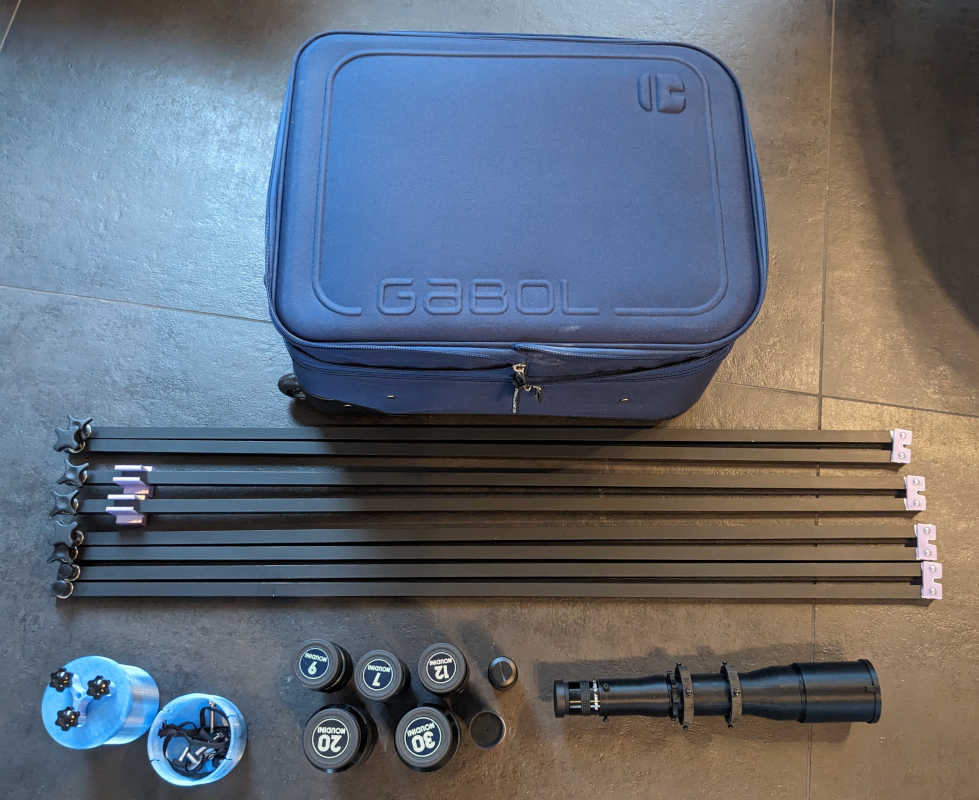
 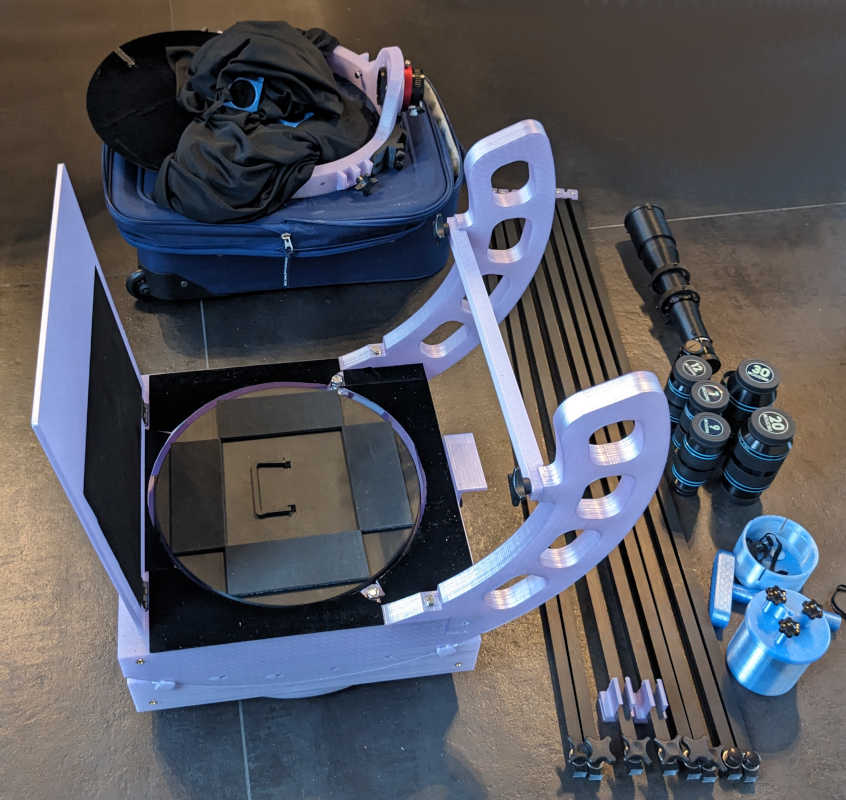
This construction project has been great fun — 3D-printing opens exciting new possibilities for telescope builders! Clear Skies!
| ||||||||||||||||||||||||||||||||||||||||||||
|